|
Ok, I've got my ecu chip and I'm about install it. There were a few companies to choose from to buy this chip and I chose
Mugen. Although I had a choice between two others which were Skunk2 and SP Racing. Mugen says their chip will change the rev
limit to 8200 RPM, increase HP by 7-12HP, and eliminate the speed governer/limiter. Of course I'm not going to install
this chip and rev my D15A6 to 8200 RPM. Any Honda guy knows D15's were just not meant to spin that fast. Hence the original
limit of 6000 RPM I believe.
Assuming I install this correctly, we will see if there is a noticeable difference. I have heard from people on the forums
that this Mugen and Skunk2 chips make your car idle kinda funny so we'll see if this is true as well.
Parts You'll Need:
- 90-91 Honda Civic/CRX PM6 ECU(This one has a 28-pin chip that you need)
- Any 28-pin performance chip w/socket, Typically from Skunk2, Mugen, SP Racing, I chose Mugen
Tools You'll Need:
- Soldering Pen w/needle tip
- Phillips Screwdriver
- Desoldering Station if you prefer
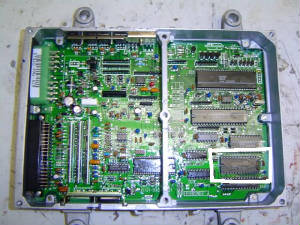
First off, you need to take off the top and bottom covers on your ECU. This will give you access to the chip-side and
the solder-side of the ECU. You'll have to locate the 28-pin chip to de-solder it. In the above picture, it shows where the
chip is on the chip-side of the ECU. If you're not sure you can always count the number of pins on each chip to be sure. All
90-91 PM6 ECU's will have 28-pins and 88-89's are not chippable you'll kno right off the bat.
Next, flip the ECU over to the solder-side and locate the bottom of the chip you need to de-solder. Double and triple
check so you don't de-solder any of the other chips by accident.
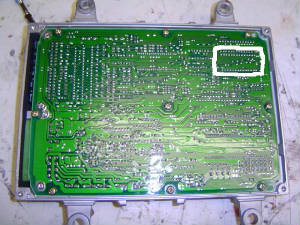
Now that you can see where the back-side of the chip is, you can start de-soldering it. Make sure you use a needle tip
soldering pen as the pins you have to de-solder are quite small. All you have to do now is heat up each pin and blow away
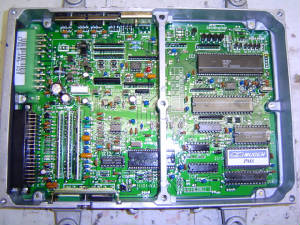
the solder until all of them are free of solder. I used an air chuck with my air compressor. Once free, slip the socket for
the new chip into place and solder it using just enough solder so that the pins look like the rest of the ECU Circuit board.
When you are all done, stuff your new racing chip into the socket and test it out. If you did it right, no check engin light
will appear and you will be able to rev your car past 4000RPM.
Good Luck!
|